Wednesday, September 16, 2009

Session 4: Special Effects

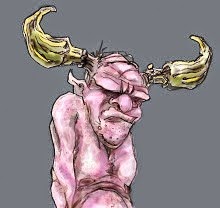
Image courtesy of CPO Digital: http://cpodigital.blogspot.com/

Homework review

Get this week's files here.


Subjects:

IPR


Depth of Field
  • lower f-stop = more blur
  • use Heads Up Display > Object Details to get Distance from Camera
  • see DOF.mb 
  • Create > Measure Tools > Distance Tool and point-constrain one locator to the camera to create a sliding scale. Use the connection editor to connect distanceDimension1:Distance to renderCam:Focus Distance (see the file DOF2.mb)
Area Lights
  • computationally more expensive
  • yield softer lighting
  • emits a number of rays according to a two-dimensional area
  • size of light icon = brightness of light
  • produces softer, larger highlights
Volume Lights
  • allows light only in a specified boundary volume
  • easy control of light's range
  • falloff controlled by a color ramp in the Attribute Editor
Negative Light
  • for faked “shadows,” put a light of negative intensity in an area to suck light out of that area
  • use fast decay to contain it
  • volume lights are particularly well suited for faking shadows: emit ambient and turn off diffuse and specular
  • try using light linking or colored negative lights (hint: set it to the opposite of the color you want the shadow to be)

Light Effects

● Fog
  • use with point, spot, or volume lights
  • spot lights have intensity and spread
  • point lights have type (normal, linear, exponential), radius, and intensity
  • three types of fog in Maya: light, environment, and volume
  • light fog is the default and most common. it can cast dmap shadows (other types cannot). Control these shadows in the light’s attribute editor under Depth Map Shadow Attributes>Fog Shadow Intensity & Samples
  • change light fog to environment or volume by MM-dragging from the Hypershade (Volumetric Section) to the Light Fog attribute
  • Environment fog is not controlled by particular lights, but exists everywhere within scene. Doesn’t cast shadows. Look under Render Options in the Render Settings window to apply it.
  • Volume fog can exist within a volume primitive. Create>Volume Primitives. Adjust Dropoff type in Attribute Editor.
● Optical Effects
  • create an optical fx shader on your light by clicking the checkered texture button next to the Light Glow field
  • can create glows, halos, and lens flares
  • use sparingly!
● Gobos
  • create by mapping a texture to the color attribute of a light
  • can create Gobos in Photoshop, use procedural textures or images you find on the web – black and white work best for “shadows”


Homework: hauntedhallway.ma


 Images courtesy of ImagineFX: http://www.imaginefx.com

Wednesday, September 9, 2009

Session 3: Shaders and Lighting Setups Revisited


This session is a recap of our first two sessions, filling in the blanks to provide a complete lighting workflow. To do this we will revisit our still life and focus on the example of the orange.
  • Homework review
  • Recap on Materials, Textures
  • Hypershade and methods of assigning materials

Step-by-step lighting discussion: Orange-HiddenLights.ma

  • Key light: specular turned off
  • Spec light: emits only spec (more control for brighter highlight; by not adjusting spec in the shader we can still have soft spec in the fill light)
  • Slash light: creates a long, narrow slash to lead the eye in the composition; uses barn doors to shape the light
  • Fill light adds blue ambience
  • Rim Light: creates a thin bright outline around the object. Should be behind the object from the camera; needs to cast shadows; light-link to the object. Easiest to set up from the camera's POV.
  • Extra Fills
  • Kicker: thicker rim lights are called kick lights. Used to bring a highlight to the shadow side.
  • Bounce light: low light, colored like the fabric below the orange, emits only diffuse.

Time permitting:
  • Render settings cont'd
  • Raytrace shadows
  • IPR
  • Camera settings


Homework: 
  • Using Orange-Start.ma, practice trying to match the MatchMe.iff image in the /images folder (optional but advised)
  • Revisit the fruit bowl with renewed vigor
Files can be downloaded here (for 90 days):
day3.zip

Wednesday, September 2, 2009

Session 2: Working with Lights and Shaders


• Homework review

Hands-on: fruit_v2.mb

Subjects:

● Depth Map Shadows cont'd

● Light Manipulator cont'd
    ● Decay Regions

    ● Barn Doors
●  IPR


● Light Linking 

Assigning Materials


● Surfaces and shaders
  • Lambert
  • Phong, Phong E
  • Blinn
  • Anisotropic
  • Use Background
● Procedural textures

● Navigating shading networks


● Mapping transparency and using high-quality renderer to preview


● Using file textures


● Placement nodes and tiling textures with repeat UV or coverage

● Intro to Hypershade: assigning materials, graphing the network


● Intro to Multilister

● Projection mapping

Intro to UV mapping

● Displacement and bump mapping 


● Shader glow for bloom

● Render Settings

● Sample rates and anti-aliasing

● Object Shape node: Render Stats


Homework: Finish Fruit Bowl 

Get project files here.

Wednesday, August 26, 2009

Session 1 Agenda: Fundamentals and Direct Lighting Setups


Part 1 Fundamentals

Keynote slideshow
Qualities of Light

Discussion: Examples


BREAK


Part 2 Hands-On: 3-Point, 4-Point, 5-Point Lighting 
Exercise: lighting_statue01.ma

Subjects:
  • Lighting Setups
    • Key
    • Fill
    • Rim/Hair
    • Kicker
    • BG Light
  • Lighting workflow: Projects, Menus and Windows, Render Settings, Render View, IPR, Shelf, Hardware Renderers, Look Through Light Camera
  • Light types: Point, Spot, Directional
  • The Light Manipulator (“t” key) - Use with spotlight to access interactive controls for the following attributes:
    1. center of interest
    2. pivot
    3. cone radius
    4. penumbra angle
    5. decay region
    6. origin/radius decay
  • Dropoff, penumbra
  • Attenuation (Decay)
  • Colored light
  • Shaping light throw with barn doors
  • Shader glow for bloom
  • Depth map shadows:
    • · Set the light’s Dmap Resolution to the lowest value that produces shadows of acceptable quality. As a starting point, set Dmap Resolution to the same value as the rendering resolution.
    • · Use filter for soft shadows
    • · Use disk-based dmap by changing to Overwrite existing dmap(s) . Use fcheck to view it (renderdata/depth). Need to hit Z-buffer button in fcheck to see depth information.
    • · Add frame ext – use for animated lights and/or objects
    • · change to reuse depth maps after you are happy with the placement of lights and objects
    • · fake transparent dmaps with lighter shadows
Homework: kitchen02.ma

Lighting 1 Welcome & Curriculum


Welcome to Lighting 1! This class is designed to enhance or jumpstart your knowledge of the fundamentals of digital lighting. Whether you are an fx artist, compositor, texture artist, animator, or practitioner of any digital art discipline, commanding the fundamentals of lighting will improve your ability to create art assets that are technically sound and efficiently renderable.

Structure
The class lectures will consist of both demonstrations and hands-on practice sessions. Please practice the techniques and do any exercises or assignments before the next class.
Files and forums may be found at the google groups page:
http://groups.google.com/group/lighting-class
(you will be invited to join at the first session)
Email the whole class with:
lighting-class@googlegroups.com 

Recommended Reading

Curriculum
(subject to change)

Class 1:

• Fundamentals of Lighting
• Lighting Workflow: Projects, Interface, Globals, Buffer, IPR, Shelf, Look through light camera
• Light Types: Point, Spot, Directional
• Dropoff, penumbra
• Attenuation (Decay)
• Colored Light
• Shaping Light Throw with Barn Doors
• Depth map shadows
• Three-Point Lighting Setup

• Exercise: lighting a statue
• Homework: lighting a still life in a kitchen

Class 2:

• Homework review

• Light Linking
• Surfaces and shaders
• Shader glow for bloom
• Render Settings
• Sample rates and anti-aliasing
• Object Shape node Render Stats

• Homework: Fruit Bowl

Class 3:

• Homework review

• Light Types: Area, Volume
• Shaping Light Throw with Gobos
• Negative light
• Optical Effects, Fog
• Camera Fundamentals
• Image Planes
• Clipping Planes
• Depth of Field 

• Exercise: DOF 
• Homework: Haunted Hallway

Class 4:

• Homework Review

• Raytracing Reflections
• Raytracing Refractions
• Raytracing Shadows
• Fake Reflections
• Survey of Maya’s Render Engines
• Render Layer Editor

• Animating Lights: intensity and color curves, expressions, etc.

• Exercises: Refraction Bottle, Bottle Collection, Candles

Class 5:

• Intro to mental ray and indirect lighting methods
• Caustics
Exercise: cognacGlass_01.ma

• Global Illumination
Exercise: global_01.ma

• Final Gathering 
Exercise: finalGather_01.ma

Class 6:

• Image Based Lighting
• HDR
• Exercise: IBL and HDR
  • Exercise 1: Using an HDR Image as Final Gather Irradiance
    13-HDRI_01.ma
  • Exercise 2: Creating an infinite Environment with an IBL node
    13-IBL_01.ma
  • Exercise 3: Physical Sun and Sky
    scene_04.mb and simpleSky.mb
  • Exercise 4: Going Deeper into HDRI, with Final Gather and Photon Emission
    IBL_Light01
Class 7:

• Intro to Subsurface Scattering and mental ray’s scattering feature
Exercise: Mac_for_scattering.ma and SSS.ma

• Intro to surface approximation and the approximation editor 
• Displacement Maps in mental ray
Exercises: approx_01.ma and dissp_01.ma

Class 8:

• Review of Maya’s shading models
• Intro to custom shaders: the mental ray shader library
• Ambient Occlusion
Exercise: occlusion01.mb

• Material shaders: Dialectric material
• Photon shaders
• Shadow shaders
• Volume shaders
Exercise: 14-crystalBall_01.ma

Class 9:

• Intro to NPR (nonphotorealistic rendering) 
• Toon Shading with Ramp Shaders and Paint Effects
Exercise: toon1.mb

• Contour Shading with Mental ray
Exercise: 14-contour_01.ma

Class 10:

• Render Layers
• Rendering Multiple Passes
• Compositing Render Passes
• Recap and review